
How to Convert Matic Token (ERC-20) to Polygon (Matic Layer 2)

NiftyKit
Jul 4, 2021
NiftyKit
Jul 4, 2021
NiftyKit
Jul 4, 2021
In this post, you’re going to learn exactly how to transfer Matic purchased on the Ethereum mainnet to the Polygon Matic Layer 2 network, step-by-step.
Here is what we'll do:
If you’re looking to get your Matic purchased on Coinbase over to the Polygon chain to purchase NFT or participate in Defi without the high fees of the Ethereum, this new guide is for you.
Getting your funds over to Polygon can be a little confusing for some people. While it might seem daunting, it's actually fairly simple. We will provide a step-by-step guide to get started on Polygon below so that you can purchase Polygon NFTs listed in MATIC.
Step 1: Setup your MetaMask Wallet to use Polygon
Metamask is a browser add-on that manages a user’s Ethereum wallet by storing their private key on their browser’s data store and the seed phrase encrypted with their password.
It is a non-custodial wallet, meaning, the user has full access and responsibility their private key. Once lost, the user can no longer control the savings or restore access to the wallet.
Interacting with NiftyKit on Polygon will be just like on Ethereum, you will use MetaMask to sign and approve transactions to purchase NFTs on the NiftyKit marketplace.

Setup your MetaMask Wallet to use Polygon
Time needed: 5 minutes.
Install or Open Metamask wallet
Download and install this wallet so we can create, buy, and sell NFTs
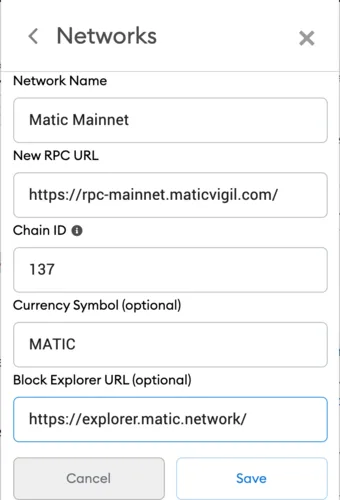
add the MATIC network into the MetaMask settings
From the main MetaMask screen select the Network drop-down, and click Custom RPC:
Click Settings tab and add name
Settings step for Polygon Matic for Metamask wallet
In the Settings tab, you can add
Matic Mainnetin the Network Name field
Add RPC URL
https://rpc-mainnet.maticvigil.com/
Add Chain ID
137
Add Currency Symbol
MATIC
Add Block Explorer URL
https://polygonscan.com/
Click Save to connect to Matic's Mainnet
You will be directly switched to Matic’s Mainnet now in the network dropdown list. You can now close the dialog.
Step 2: Move Funds from ETH to Polygon
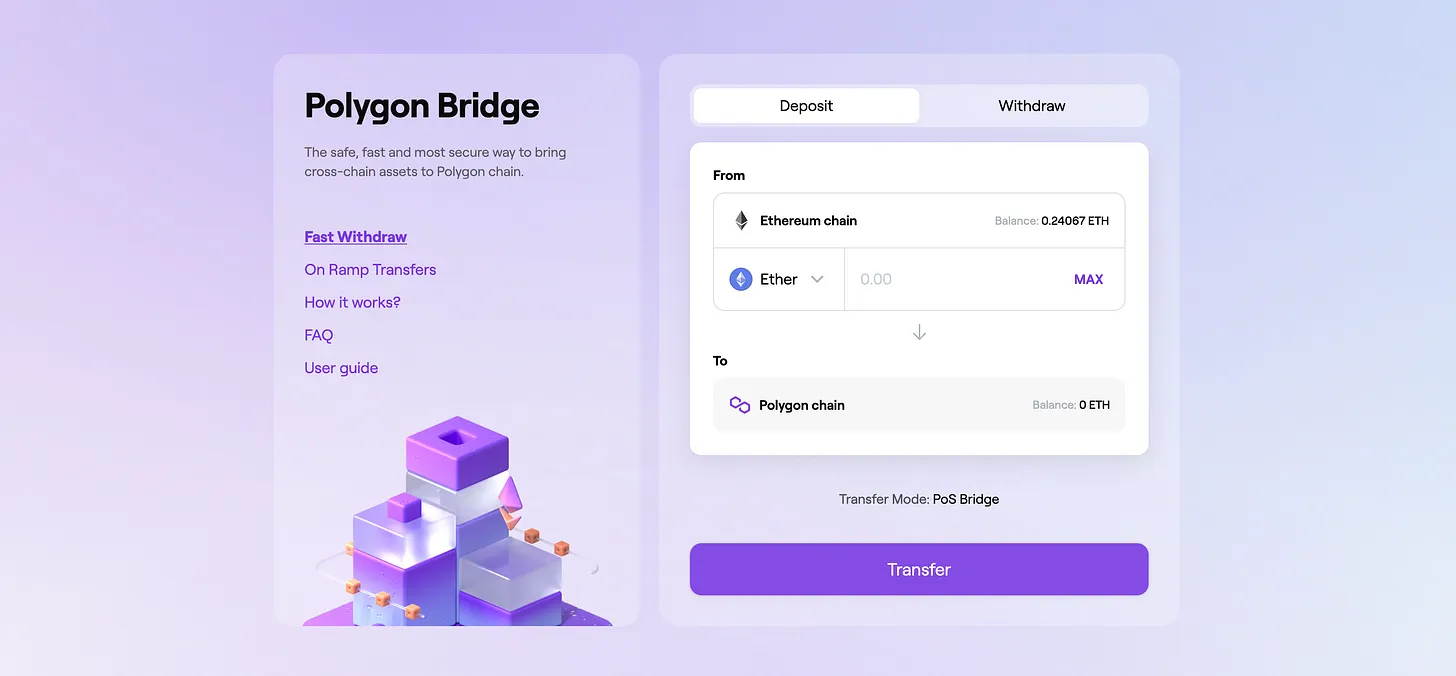
Polygon has its own bridge to get funds over to its network from the Ethereum mainnet.
First, make sure your MetaMask is on the ETH network (in case you’re still on Polygon).
Then visit the Matic wallet bridge here: https://wallet.matic.network/bridge
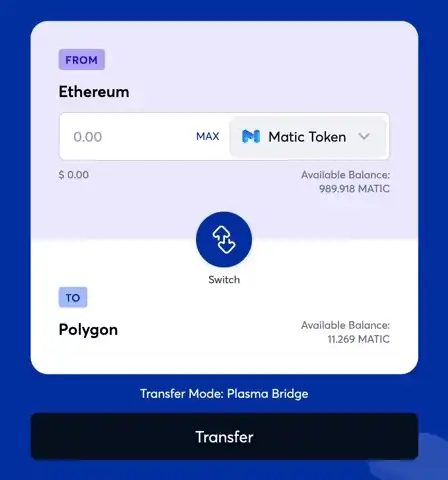
Once you login, this will take you directly to the bridge. Next you need to choose the token (MATIC Token) you want to send over to Polygon. After you select your token, enter the amount you want to send, or click Max to send it all.
Once everything looks good, click Transfer
A message window will pop up. This is saying that the transaction will take a few minutes so be patient.
The next window is the transfer costs that you will need to pay the gas fees in ETH since this is an Ethereum transaction.
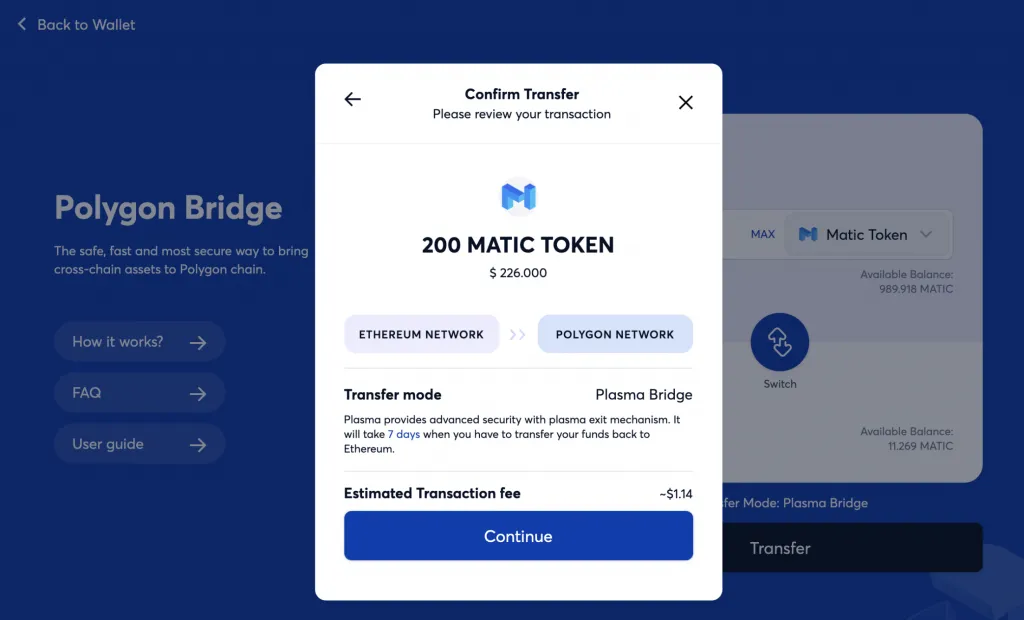
Try to do this when gas prices are low, you can check here: https://www.gasnow.org/ – If you are good with the costs click Continue.
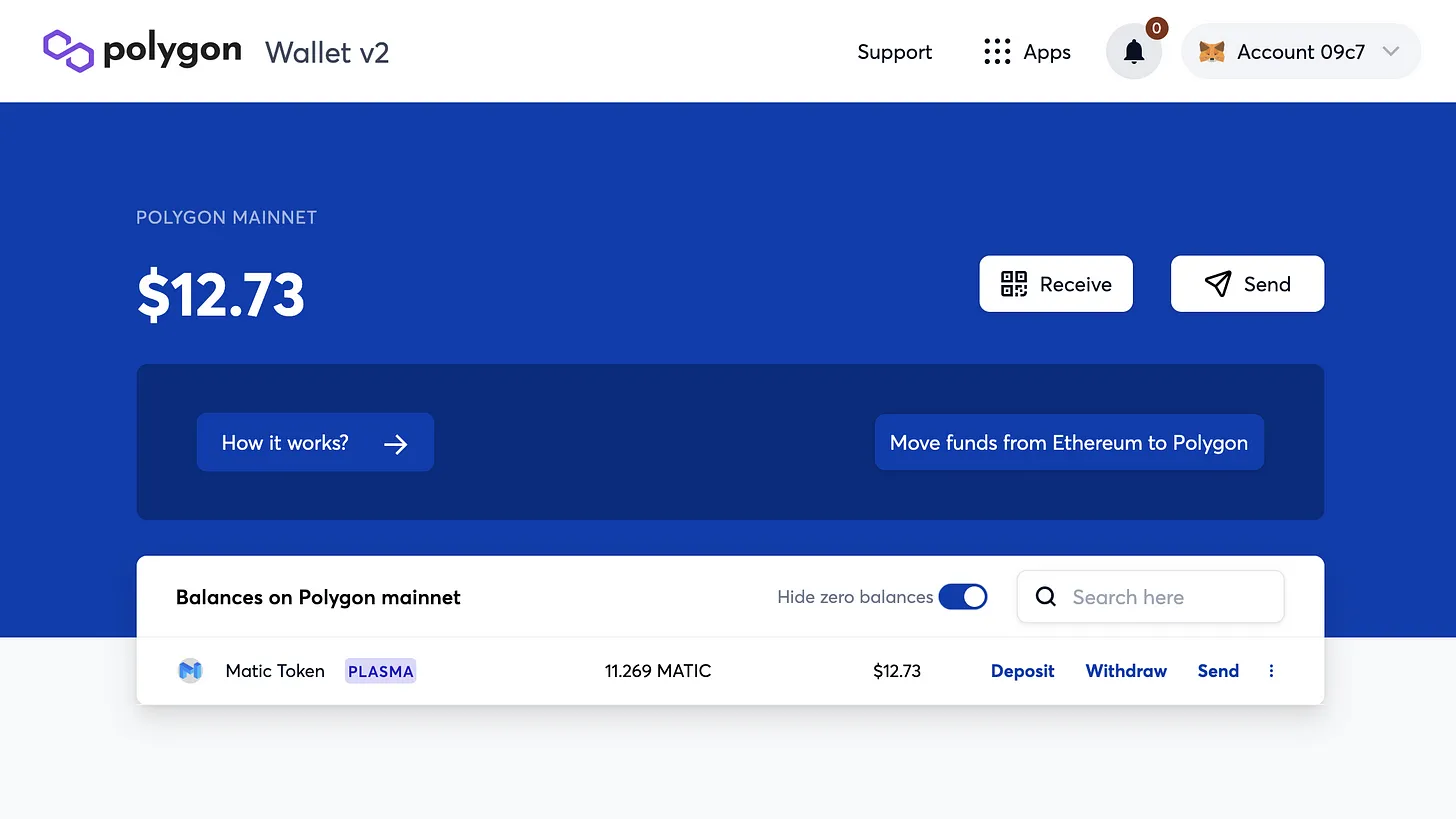
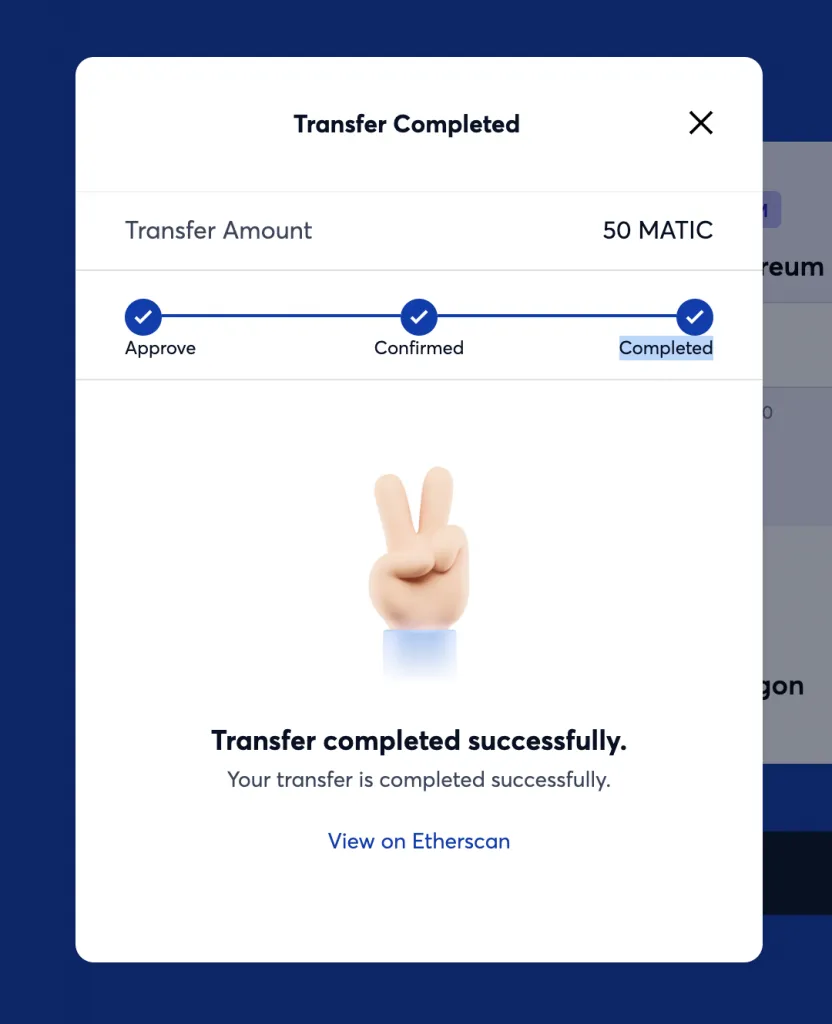
Once your transfer is Completed you will now see your MATIC balance populate under the MATIC network.
Step 3: Purchase NFT Using Polygon Matic
Once you have verified that your funds have transferred to your wallet, you can go to https://app.niftykit.com to connect and confirm that you are connected with Metamask and that you are connected to the Matic Network configured in your Metamask in the first step of this tutorial.
Navigate to the NFT that you want to purchase and pay with Matic to complete your purchase.
How to Convert Matic Token (ERC-20) to Polygon (Matic Layer 2)
NiftyKit
Jul 4, 2021
NiftyKit
Jul 4, 2021
NiftyKit
Jul 4, 2021
In this post, you’re going to learn exactly how to transfer Matic purchased on the Ethereum mainnet to the Polygon Matic Layer 2 network, step-by-step.
Here is what we'll do:
If you’re looking to get your Matic purchased on Coinbase over to the Polygon chain to purchase NFT or participate in Defi without the high fees of the Ethereum, this new guide is for you.
Getting your funds over to Polygon can be a little confusing for some people. While it might seem daunting, it's actually fairly simple. We will provide a step-by-step guide to get started on Polygon below so that you can purchase Polygon NFTs listed in MATIC.
Step 1: Setup your MetaMask Wallet to use Polygon
Metamask is a browser add-on that manages a user’s Ethereum wallet by storing their private key on their browser’s data store and the seed phrase encrypted with their password.
It is a non-custodial wallet, meaning, the user has full access and responsibility their private key. Once lost, the user can no longer control the savings or restore access to the wallet.
Interacting with NiftyKit on Polygon will be just like on Ethereum, you will use MetaMask to sign and approve transactions to purchase NFTs on the NiftyKit marketplace.
Setup your MetaMask Wallet to use Polygon
Time needed: 5 minutes.
Install or Open Metamask wallet
Download and install this wallet so we can create, buy, and sell NFTs
add the MATIC network into the MetaMask settings
From the main MetaMask screen select the Network drop-down, and click Custom RPC:
Click Settings tab and add name
Settings step for Polygon Matic for Metamask wallet
In the Settings tab, you can add
Matic Mainnetin the Network Name field
Add RPC URL
https://rpc-mainnet.maticvigil.com/
Add Chain ID
137
Add Currency Symbol
MATIC
Add Block Explorer URL
https://polygonscan.com/
Click Save to connect to Matic's Mainnet
You will be directly switched to Matic’s Mainnet now in the network dropdown list. You can now close the dialog.
Step 2: Move Funds from ETH to Polygon
Polygon has its own bridge to get funds over to its network from the Ethereum mainnet.
First, make sure your MetaMask is on the ETH network (in case you’re still on Polygon).
Then visit the Matic wallet bridge here: https://wallet.matic.network/bridge
Once you login, this will take you directly to the bridge. Next you need to choose the token (MATIC Token) you want to send over to Polygon. After you select your token, enter the amount you want to send, or click Max to send it all.
Once everything looks good, click Transfer
A message window will pop up. This is saying that the transaction will take a few minutes so be patient.
The next window is the transfer costs that you will need to pay the gas fees in ETH since this is an Ethereum transaction.
Try to do this when gas prices are low, you can check here: https://www.gasnow.org/ – If you are good with the costs click Continue.
Once your transfer is Completed you will now see your MATIC balance populate under the MATIC network.
Step 3: Purchase NFT Using Polygon Matic
Once you have verified that your funds have transferred to your wallet, you can go to https://app.niftykit.com to connect and confirm that you are connected with Metamask and that you are connected to the Matic Network configured in your Metamask in the first step of this tutorial.
Navigate to the NFT that you want to purchase and pay with Matic to complete your purchase.